Pages

Friday, 28 September 2018

Dogtooth Kingston Jacket!


Dogtooth Kingston Jacket


Pattern - Kingston Jacket Ladies

Kingston Jacket Add On

Thumbhole Tutorial


Hey everyone, so I’m back again showing off a little something I’ve been busy working on, you may have already seen this on my Instagram or Twitter but here’s a complete write up... Now I can’t really remember how I found this pattern, but I do remember thinking “This... This is just SO me, I need to make it!!!” the pattern I’m talking about is the Kingston Jacket & Add-On from Rebecca Page.

The Kingston Jacket is like the ultimate pick ‘n mix pattern, you choose what sleeves and what kind of pockets you want and if you get the Add-On pattern you get even more to choose from, different pockets, another sleeve option, a hood and even a back frill... All in all, there are 6 sleeve options, 4 pocket options, a hood or a collar and an optional back frill so lots of choice! The minute I saw it I was picturing loads of combinations, then with a very sobering thought I quickly realised that I had made the grand total of ZERO dressmaking projects and maybe two or three things with my sewing machine at this point, so with that in mind I set out to gain the required skills to make it, or to give myself half a shot at the very least... I could have winged it and just went for it but it wasn’t something I wanted to rush into, I didn’t want to end up ruining the fabric by constantly unpicking it or doing it and hating it entirely, so I took my time and didn’t even buy the pattern until I felt comfortable going for it, which may seem a bit over the top but I know myself, I would have been too tempted. To prepare myself (more mentally than anything) I made two tops in cotton, a denim Hepworth Apron (pattern from Jenni Smith) and read A LOT of books, blogs and articles about working with denim and knit fabrics before I felt ready to attempt this jacket. While I was playing with the different patterns and fabrics I found that I really loved making my own clothes... It wasn’t something I set out to do when I first got my sewing machine but after one garment I was well and truly hooked, I loved the process, I loved the way it felt to wear the finished item, how proud I felt when someone commented on it... I just really loved the whole thing... In short? I was hooked!

Patternsy Delivery!
The only downside to the pattern (and bear in mind I use the word downside very loosely here) was that it was a PDF download only, meaning that I had to either print it out and stick it all together at home OR get it printed at a print shop, I didn’t really feel like printing it at home because it seems like such a mission so I set out to find a place to get it printed, and that’s how I found Patternsy. Patternsy are a brilliant pattern printing company, they print on thin tissue paper and they even have a few options so they can make the printing even cheaper for you, I looked at a few printing shops and the quotes to print this pattern cost a fair bit more, almost twice as much in some places and they have zero experience with sewing patterns, they can just print the A0 format. After I had uploaded my files I worked out that there were some sheets that I didn’t need printing because they were just some of the sleeve options that I’m never going to use, and the staff were fantastic, after a few emails everything was sorted, and my order was paid for and done! When it arrived, I was pretty impressed with the print job... the paper is super thin, so I wasn’t expecting it to be as clear as it was or for the paper to be as resilient as it is, I have unfolded and refolded these sheets a fair few times now and they are still as good as they were when they arrived. I had always wanted to make this jacket a few times in a few different sizes so for this reason I wanted to keep the master pattern intact, so I traced the pattern onto greaseproof paper in the size I wanted, and the greaseproof paper has worked a treat.


My fabric and thread choices
By the time I had the pattern printed I had made my decision on what combination of pockets, sleeves etc I wanted to use to make my jacket (I went for the knit sleeves, knit hood, internal pockets and welt pockets from the Add On and the chest pockets from the main pattern) but I didn’t know what fabrics or even what colours I wanted to do it in so I spent some time going through the different fabric sections on the Minerva Crafts website and that’s where I found this awesome dark teal dogtooth quilted jersey fabric, the moment I saw it I fell completely and utterly in love with it, and once I had stumbled across this gem it was easy to work out the rest. I chose a bright teal Gütermann top stitching thread and matching sew-all thread, 17mm silver star Prym Jeans buttons, a glitter silver 120cm flat shoelace for the hood drawstring and I pulled a Star Wars fat quarter out of my stash for the welt pockets and then it came time to choose the denim... I decided to do it in an 8oz denim, so I was looking through the colour options available and decided I wanted to go with a very light blue, so I placed my order and waited... When the fabric came everything was brilliant... until I noticed weird stains and splotches all over the fabric... Now here is where I can’t praise the staff at Minerva Crafts enough they were all so patient and helpful during the whole ordeal, the next day I rang them up and the lady I spoke to was absolutely brilliant, after a quick chat the return was arranged and another order was placed for the same fabric, she put a note on the order asking the warehouse staff to check the new piece for the same stains and then requested that they also send it up to the office so they could check it too. Unfortunately a little while later I got a phone call back from them saying that they’d checked the whole bolt of fabric and it was all damaged, so I decided rather than wait for more of it to come into stock that I would choose a different colour, this time I decided to go for the other end of the scale and went for black denim thinking that the thread would really pop against it, again they were going to check it over as it was from the same supplier, but alas it wasn’t meant to be, an hour or so later I got an email saying it was unexpectedly out of stock and as silly as it sounds I really didn’t want to wait the 7-10 days that it would have taken to come back in stock then be delivered to me, so third time lucky I rang them and we changed the colour again... this time going for the next blue up from the denim I initially ordered and I cannot even begin to tell you how happy I was when I got that dispatch email!

My Dressmaking Project Bible
In between all this happening I was talking to another company who make some of the best stationery products I’ve come across, Stationery Geek, a few months before they had posted a photo of their calendar with all their upcoming events on their Instagram and I spotted an upcoming release for a Dressmaking Project Bible. I was anxiously awaiting the release of this item because I already have the Crochet Project Bible and I can’t even begin to tell you how helpful it’s been to keep all my projects in line, so I was desperate for the dressmaking one, anyway I was talking to them about another one of their products and just inquired about the dressmaking bible and they asked me for some help/advice on the terminology etc for the book and I was more than happy to help out. The reason I’m writing about this here is because my Dressmaking Bible was absolutely invaluable while making my Kingston jacket, I was able to write down all the different tension settings, stitch lengths, stitch types and I was able to keep track of the differential settings for my overlocker too, because of the two different fabric types, the different threads and the two different machines it was just too much to keep track of mentally so I drew up a small chart to keep track of everything. I will be writing a separate blog post to review the dressmaking bible soon (probably next) so if you want to see more of that then definitely keep your eyes peeled!

Welt pocket
So, after pre-washing all the fabric and cutting out all the pieces I needed I sat down with some scraps and worked out all the settings I needed to use for each fabric, I tried out the buttonholes and the different stitch and fabric combinations I’d be working with and wrote down all my findings in my Dressmaking Bible. I had never done flat fell seams or worked with knit fabric before, so I managed to combine a lot of the testing with a bit of practising too, the instructions are so detailed and easy to follow I really can’t fault them at all, I didn’t get lost or confused once. The instructions are comprehensive, so I got them printed and went through them with a highlighter to highlight all crucial pieces of information, mainly for the flat fell seams, I didn’t want to start sewing with the wrong piece on top!


Starting to look like a jacket!
When I finally sat down to sew I slowly worked my way through the instructions and at the end of each step I was that much closer to having something that resembled a jacket, watching it grow from a few pieces of fabric into something that was so recognisable was so gratifying, I’m not going to lie and tell you that it all went perfectly the first time because it didn’t, don’t get me wrong there were no major mistakes or issues, it was mainly due to me being a bit of a perfectionist, basically I unpicked any part that I wasn’t 100% happy with, even if it was just one stitch that I wasn’t happy with. I had to redo the hood completely because somehow it managed to completely move and was a good inch or so out on one side (actually thinking about it now it might have stretched while I was sewing it), but honestly that was something I should have double checked before attaching it anyway, it was also the last bit of sewing that day so I was probably tired too, but either way I had more than enough fabric left to cut another hood and I didn’t even want to attempt to salvage it once I’d unpicked it because it had also got a weird chunk out of it so I’m guessing something went seriously weird while I was overlocking… Don’t sew/overlock when you are tired folks!! One part that kind of irritated me was the way my buttonholes came out... They looked really messy around the raw edges so I just got my needle and thread out and whipped around the edges of them so they looked neater and were more secure, they just looked more finished now and I'm much happier with them.

The buttonhole on the left is "finished" and the one on the right is "unfinished"

Internal pocket


I had also decided while I was looking through the pattern that I wanted to do thumb holes in the cuffs... I am a HUGE fan of thumb holes and all my favourite jackets have them, so I knew this one had to have them too. I’ve got quite long arms so I had to not only lengthen the cuffs to accommodate the thumb holes I also needed to lengthen the sleeves, this is the first pattern that I’ve done any kind of pattern adjustments to and I’m quite pleased with the method I came up with, the pattern pieces for the knit sleeves and cuffs don’t have lengthen/shorten lines so I made my own.


Only missing the waistband!

I used the grid on my cutting mat to line up the grainline so I could add the lengthen line about half way down the sleeve (just below where the elbow would be) and the same with the pattern piece for the cuff, although with the cuff you have to take into account the fact that the pattern piece for the cuff is going to be folded in half so you have to lengthen each side of the fold line the same amount. I did contact the Rebecca Page customer service about this because being a newbie I didn’t want to do it wrong, especially if there was a specific point where I should be adding the length but I was impatient and thought “If they say to do it a different way then I’ll just retrace the pattern piece and redo it!”, turns out I had done it right. I also told them why I wanted to lengthen them, and they pointed me in the direction of one of their videos on their YouTube page showing you how to do thumb holes. It’s a truly fantastic tutorial and it worked first time, now I’m not going to lie and say it’s so easy because it isn’t... Well it is, it’s just a bit fiddly because you’re basically doing origami with the fabric, which in hindsight would have probably been a lot easier if I wasn’t using a quilted fabric... Nonetheless I pulled it off and now I have a seriously awesome jacket with the thumb holes of dreams!!!!!


I LOVE IT!!!


I definitely wouldn’t hesitate to buy another pattern from Rebecca Page, I’ve actually already got my eye on a few ;) and I also have another 2 versions of this jacket in mind, one of which me and my sister have been toying with for a few months now, it was actually an idea that was being developed even before I had bought the pattern, and we’ve just started gathering up the materials needed to make them... I am really bursting at the seams to spill the beans on the plans for this jacket, but I really want the surprise unveiling so much more so you’re going to have to wait for the blog post or the Instagram photos to drop! I will be back soon with another post, and I’m hoping to film some more YouTube videos this week!

Tuesday, 10 July 2018

Jo Carter’s Big Eared Bunny... or in this case Bunnies!!!

Jo Carter's Big Eared Bunny... or in this case Bunnies


From left to right bunnies 1-5

Exciting news!!! I got a sewing machine for Christmas, so now I have another craft that I will be sharing projects from. Guys I lost my crojo (crochet mojo for those of you that don’t know) and so I’ve been a bit miserable, crochet and craft in general is therapy for me, like I’m sure it is for so many of you, losing my crojo was awful, I honestly didn’t know what to do with myself so I turned to my sewing machine. I figured that as a beginner maybe I could get to know my machine better make a few not so perfect items and just generally get to grips with the whole sewing thing... There is a fantastic sewing shopping channel that has been around for a year on Freeview that came to Sky tv at the beginning of the year called Sewing Quarter (you can watch on YouTube and through their website too), they sell a lot of stuff, most of which I had never come across before, you can checkout as many times as you want in a day and only pay one lot of P&P and they do demonstrations with some brilliant professionals. So I was watching this channel one day and they had a designer on called Jo Carter and she was making some soft toys that she had designed, this particular day she was doing bunny rabbits, I was instantly glued to the tv watching, utterly fascinated with how these flat pieces of fabric were going to turn into this awesome looking cuddly bunny! They were selling kits that had enough fabric to make 2 or 3 bunnies, stuffing, wadding, instructions and thread so I thought “Hey I’ll buy that and make some for my nephews for Easter!” now... I have to confess to something... I wasn’t exactly listening to them when they said that it was a bit fiddly and maybe NOT a beginner project but in my defence it’s because I was too busy ordering my kit ;), and to be honest I’m one of those people that would rather throw themselves into the deep end and see what happens.

I wanted the rabbits to be perfect for my nephews so I grabbed 2 Fat Quarters from my stash and used those to make what I affectionately dubbed the 'Practice Bunny’. (NOTE I recently found out that you can also download this pattern for free from Love Patchwork and Quilting here if you would like to make one of your own.)

Practice Bunny limbs and ears
Practice Bunny ear quilted
Practice Bunny body flat


Practice Bunny with the base tacked into place
Practice Bunny finished!
I used freezer paper to copy the templates from the pattern, the great thing about freezer paper is that you can see through it like tracing paper but it has this waxy side to it that when ironed (waxy side down), it will stick to your fabric without damaging it, so you can iron your templates onto your fabric then either cut round it or draw round it and then just peel the paper away, I’ve now made 6 bunnies and I’m still using the first templates I made so it’s reusable too, obviously it will never be quite as good as the first time you use it but it’s still perfectly useable. Jo’s instructions are pretty fantastic, I didn't get stuck once, I just followed the instructions and pictures and took my time and by the end I had a fairly decent bunny! I had only sewn one other thing before I made this and that was a project bag for my crochet so doing something like this was quite a bit different. There are a few places where you need to really pay attention to the pattern, like when piecing the face, it’s crucial that you look at the pictures to work out which sides of the side face pieces attach to the middle face piece and when attaching the base I found it easiest to hand tack it in place like it says in the instructions before machine sewing it, because it is a fiddly piece as you have to accommodate the legs and everything as well as sewing it in place properly, it’s not impossible though just go slowly and take your time, if you need to stop and readjust then put the needle down and do it!

Bunny #2 & #3 ears
Bunny #2 & #3 faces and limbs

Bunny #2 & #3 flat bodies
Bunnies #2 & #3 finished, flanking the "Practice Bunny"
On bunnies 2 and 3 I done some things slightly different, I still followed the pattern but there is a part when sewing the limbs you have to go around a curve where the hands/feet would be... I found that trying to do it using the 1/4” Seam foot as a guide was too tricky (I’m a perfectionist) so for bunnies 2 and 3 I used my mechanical fabric pencil to draw a line where the 1/4” should be and then followed that line and I was so much happier with the results! I also found it easier to tack the base in place if I pinned the body seam closed at 1/4” first because it meant I could be more accurate with the placement of it. I also made them simultaneously so I could speed the process up by chain piecing. 

Bunny #4 body and head

Bunny #4 finished (with eyelashes)


For all the faces I done colonial knots for the eyes and just simple backstitch for the rest. I totally winged it in terms of placement but if you wanted to you can use an erasable fabric pen to draw where you want each feature to go you can, that’s entirely personal preference, and don’t be afraid to mix it up to give your bunnies some character, some of my bunnies have eyelashes so they look like girl bunnies and one even has a little organza ribbon double bow across one ear. I think the pattern says to do whipstitch to close the back seam but I decided that I liked the look of a ladder stitch instead because it looks seamless! I will warn you that these bunnies are addictive and the multiply quite quickly ;) they are quick, easy and fun to make and don’t actually use that much fabric!


Bunny #5 ears and limbs
Bunny #5 finished


Bunny #6 finished (with eyelashes and bow)
The fabric I’ve used is from various places, bunnies 1 & 5 were each made from 2 fat quarters from packs I bought from Hobbycraft, bunnies 2 & 3 were made with Makower Spectrum Solid in Slate and 2 fat quarters that I again purchased from Hobbycraft (1 Peter Rabbit and 1 navy blue and metallic gold dots) and bunnies 4 & 6 were made using the fabric from the actual kit which was Makower Spectrum Solid in Biscuit and Blue Flower Print Japanese Cotton Printed Broadcloth (I still have enough left to make another bunny in these fabrics if I want to). As you can see the bunnies don’t use a lot of fabric, you just need 2 fat quarters one colour for the main body and one for the contrast colour. Here is the link to the YouTube show when Jo Carter is demonstrating the bunnies so you can watch them if you are unsure of how to do certain parts. :)

As I am writing this post, I have found my crojo again! It’s been a long 8ish weeks without it but it seems to be back I’m currently working on the Colour Crafter version of the Sophie’s Universe blanket, so hopefully it’ll stick around and I’ll have some more crochet news to share soon! 

***I wrote this post a few months ago and since then we’ve had some MAJOR internet issues which has delayed the posting of this which has been really frustrating but on the flip side it means I have more projects and stuff that I can post about :D***

Wednesday, 14 February 2018

Crafty Things I Love.... Part One

Crafty Things I Love.... Part One


Seeing as it's Valentine's Day I thought I'd share some of the crafty things I love, I've decided that seeing as this post could end up being huge that I'll split it into two... Tools and my go to yarns this week and I'll cover indie yarn dyers and Podcasts/Vlogs next week!


Tools -

Below are some of the tools that I use nearly every single day, they not only make my life easier they also make my finished items look so much better.

Clover Amour Crochet Hooks Set (2mm-6mm)
Before I purchased these hooks I had a cheap ergonomic set... I was a knitter, had never crocheted before and I had no idea if I was going to stick with it, after a couple of months I decided that this set was the way forward and I noticed the difference the second I held them in my hand. They are fantastic quality, feel amazing in your hands thanks to the ergonomic soft touch handle and the metal shaft of the hook is just incredible, I don't know how to explain it but the aluminium is so silky and smooth that you can pull through the loops easily but somehow the yarn doesn't slip!!!! Honestly sometimes I think these hooks are infused with magic ;)

Clover Darning Needles
These needles come in three sizes in this cute little tube to keep them safe, they really are great and I use them to sew the ends in on all my crochet and knitting projects. They glide through and they have decent sized eyes too which is super handy!

Hemline Rainbow Dressmaking Scissors
It's so hard to get a good picture of these scissors because the lighting is absolutely not playing ball today but if you Google them you'll see why I wanted these bad boys in my life... I haven't used them yet because they literally just arrived today but I've read and heard so many good things about them, they are a nice weight and super sharp so I have no doubts about the quality of them whatsoever.

Embroidery Scissors 
They don't need to be anything fancy, mine aren't, although I have got my eye on a few different pairs at the moment ;) the Scheepjes scissors with necklace and holder and the Milward Rainbow Scissors are two of them.

Stitch Markers
Ok so I have a few different types of stitch marker, I have a box of bulb pins, some locking stitch markers from KnitPro, a set of Rose Quartz ones (for knitting) and a few handmade ones on lobster clasps. Stitch markers are fantastic for keeping track of the beginning/end when you're working in the round, for those complex patterns that require a lot of counting just pop a stitch marker in when you need to increase/decrease and the main one for me is to stop crochet unravelling when you put it away.

KnitPro Symfonie Circular Needles
I LOVE these needles! They not only look great they feel great as well, I have a real hatred of stitches slipping and an even bigger hatred of dropped stitches... Don't get me wrong I can deal with both if I must... but dropped stitches due to having inadequate tools is not something I enjoy, it takes all the enjoyment out of a project, somehow these needles are a perfect balance between gripping when you need them too and slipping when you're trying to knit your stitches.

Digital Row Counter
This handy tool is pretty self explanatory, just wrap it around your finger and hit the button for whatever you're counting.

Yarn Brands -


I use quite a few different yarn brands but I have 2 that are my go to....

My take on the 2017 Hygge CAL


Scheepjes
I discovered Scheepjes after buying their 2017 CAL Hygge kit, I was starting my shawl when everyone had already finished theirs but that just meant I got to benefit from all of their knowledge. Working with their yarn really made me realise how different a project can go if you buy a quality yarn, we've all had a project where we really hated with the yarn and I can honestly say I've made a few things with different Scheepjes yarn now and I haven't found a yarn from them that I hate working with yet.

Blanket made using Stylecraft Special DK


Stylecraft
Now this one seems pretty obvious, Stylecraft are loved by many of us and for good reason too. The one I've used the most is the Stylecraft Special DK, I love the range of colours and the fact that it's machine washable and dryable is a huge selling point for me, it's also super soft and snuggly too!

Wednesday, 31 January 2018

Blogger's Bible Review

Blogger's Bible

from
Stationery Geek


Front Cover
So a few months back I was browsing the Stationery Geek website after discovering their Crochet Project Bible and I stumbled across this gem and just knew I had to buy it, it's basically a planner for your blog... But it is so much more than just a planner -  with nearly 2000 social media stickers, inspirational pages, contacts pages and even goals and achievements it's kind of like having a bit of a cheerleader to keep you motivated, I haven't started using it properly yet but it's given me loads of ideas for future posts that I've already started planning and that's just from looking through it.

I'm going to talk about Stationery Geek for a minute... They are a fantastic company with a fairly diverse range of products, some of my favourites include, My Crochet Project Bible, the Crochet/Knitting/Craft Pencils and My Quilting Project Bible (my big craft goal for 2018 is to make a quilt so I'll definitely be getting this soon!) They don't just make items for crafters they also make stuff for kids, families, fitness, schools and teachers... They really have something for everyone and they are more than happy to customise the items too so you can have your logo or a photo on them or even just your name, or if you're like me and have the Blogger's Bible you can plan to do some customising of your own and actually paint or heat emboss the cover ;) Seriously go and have a look at their products you won't be sorry, they ship worldwide too.

(here is a link to get you 10% off your first order from Stationery Geek  CLICK HERE just wait for the box to appear, pop in your email and you'll get a code for 10% off ANYTHING on their site, this link is a referral link so I'll get a discount voucher if you order)

My Custom Stickers

Now let's talk about the awesomeness that is the Blogger's Bible, like I said above inside you get nearly 2000 stickers, they are all different social media icons (blog, Facebook, Twitter, Instagram, Pinterest, LinkedIn, Snapchat, Email, Google+ and YouTube, there is also a plain white box at the end which you could use for anything) so you can keep track of where you've posted and where you still need to post, also there is a pretty awesome page which shows you the peak times to post to each social media platform so you can get your posts maximum visibility! The stickers are actually a part of the book so you don't have to worry about losing them and when you've used a whole page you can just cut/rip it out if you don't want the empty page in there. I don't use all the social medias that the stickers cover so I emailed Stationery Geek and asked if I could swap some (see photo above) and they were SO helpful, after a few emails back and forth they knew exactly what I wanted and had told me how to go about ordering it, which couldn't have been simpler, the dispatch time was pretty incredible too, I ordered one day and it was shipped the next which is amazing anyway let alone for a customised item.

Grid Calendar

There are 2 calendars in the book, grid style and list style, I know that I prefer different styles of calendar depending on what I'm using it for so I'm planning to actually use the two different calendars in the organiser for different things, the grid one will be for planned posts and CALs I'm participating in and  I haven't quite decided what I'll use the list one for just yet... 

Schedule Page
It's A4 in size so you don't have to worry about squeezing your handwriting into small spaces because there is more than enough room on each page. Each month is separated with its own cardboard divider that matches the cover and each month has it's own brainstorming page, goals/monthly overview, grid calendar and then the schedule pages (pictured above) at a glance on the schedule pages you can see if a post has been written, proofed, scheduled, published and if the photos have been taken, the idea is that you can tick the boxes when each task has been completed or if you want to be more thorough there is enough room to write the date each task was done instead. The greyed out social media icons are where you put the stickers once you've posted and there is a Follow Up bar below that to remind you to check for comments etc, there is space for 14 different blog posts each month which is more than enough for me!

Monthly Divider
All in all I think this is a brilliant product and I can't wait to use it properly, I think it's going to be so helpful with keeping me organised and focused so hopefuly it'll mean more posts and content and that I remember to update my projects on Ravelry more often ;) I've been thinking about this and it's great doing a post like this letting people know all about the product and how you 'think' it's going to help you but what you really need is updates to PROVE how effective it has been, so at the end of June I will be doing a 6 month update and at the end of the year I will be doing a 12 month update too.

***These opinions are completely my own!***

Wednesday, 17 January 2018

Christmas Crocheting

Hi everyone, once again there has been a big gap between posts :( unfortunately life and illness got in the way BUT I am aiming to carve out time each week to dedicate it to writing and scheduling posts :D Anyway this post is titled Christmas Crocheting because this year I decided to make more presents, I ended up making 8 things in total and rather than write a post for each item I thought I'd round 7 of them in one neat tidy post, the 8th hasn't been given to the recipient yet so that post will come later, so here goes...

Stormy Seas Blanket

The colours for this blanket were partly inspired by this piece of art

I wanted to make my sister something special this year as she was pregnant and due in December, I thought that a blanket would be perfect so I started searching for a pattern but after an hour of looking I wasn't having much luck, the problem with that became apparent pretty quickly when I thought about it... I hadn't decided what type of blanket I wanted to make! At the time I was watching some podcasts on YouTube and one of the podcasts/vlogs that I love watching is the one by Lindsey from Lottie and Albert, I think she has a great energy and she always has an interesting range of projects on the go too, as well as designs, and it was one of her designs that really caught my eye, the Lottie and Albert Rainbow Blanket, the idea of using six strands of DK and a 20mm hook was intriguing to me so I started looking into it.

My sister isn't really into rainbows but she loves blues, turquoises and teals so I had a look at my Stylecraft Special DK Shade Card, I wanted something that was machine washable and dryable and I love working with Stylecraft so it was a no brainer. It wasn't hard to pick out six colours that she'd love that go well together in fact it was hard to only choose six, the colours I used were Graphite (1063), Grey (1099), Atlantis (1202), Waterfall (1125), Turquoise (1068) and Empire (1829), I used two balls of each colour because I wanted it to be big enough for her to wrap up in it, so in the end the blanket ended up being roughly twelve balls which is 1.2kg of yarn!

When it came to getting a hook big enough the choices are a lot more limited... I had two options, I could get a plastic one from Pony or a wooden one from KnitPro, after holding the plastic one at my local yarn store I came home and thought long and hard about it and in the end decided that I wanted the wooden one, I have absolutely nothing against Pony or plastic hooks in general I just didn't like the way this particular one felt in my hand, it just didn't feel right holding something that size and it having no weight behind it, so I ordered the 20mm Jumbo Birch hook from KnitPro and when it arrived it felt so much better in my hands more natural and a lot less awkward!

Winding the yarn
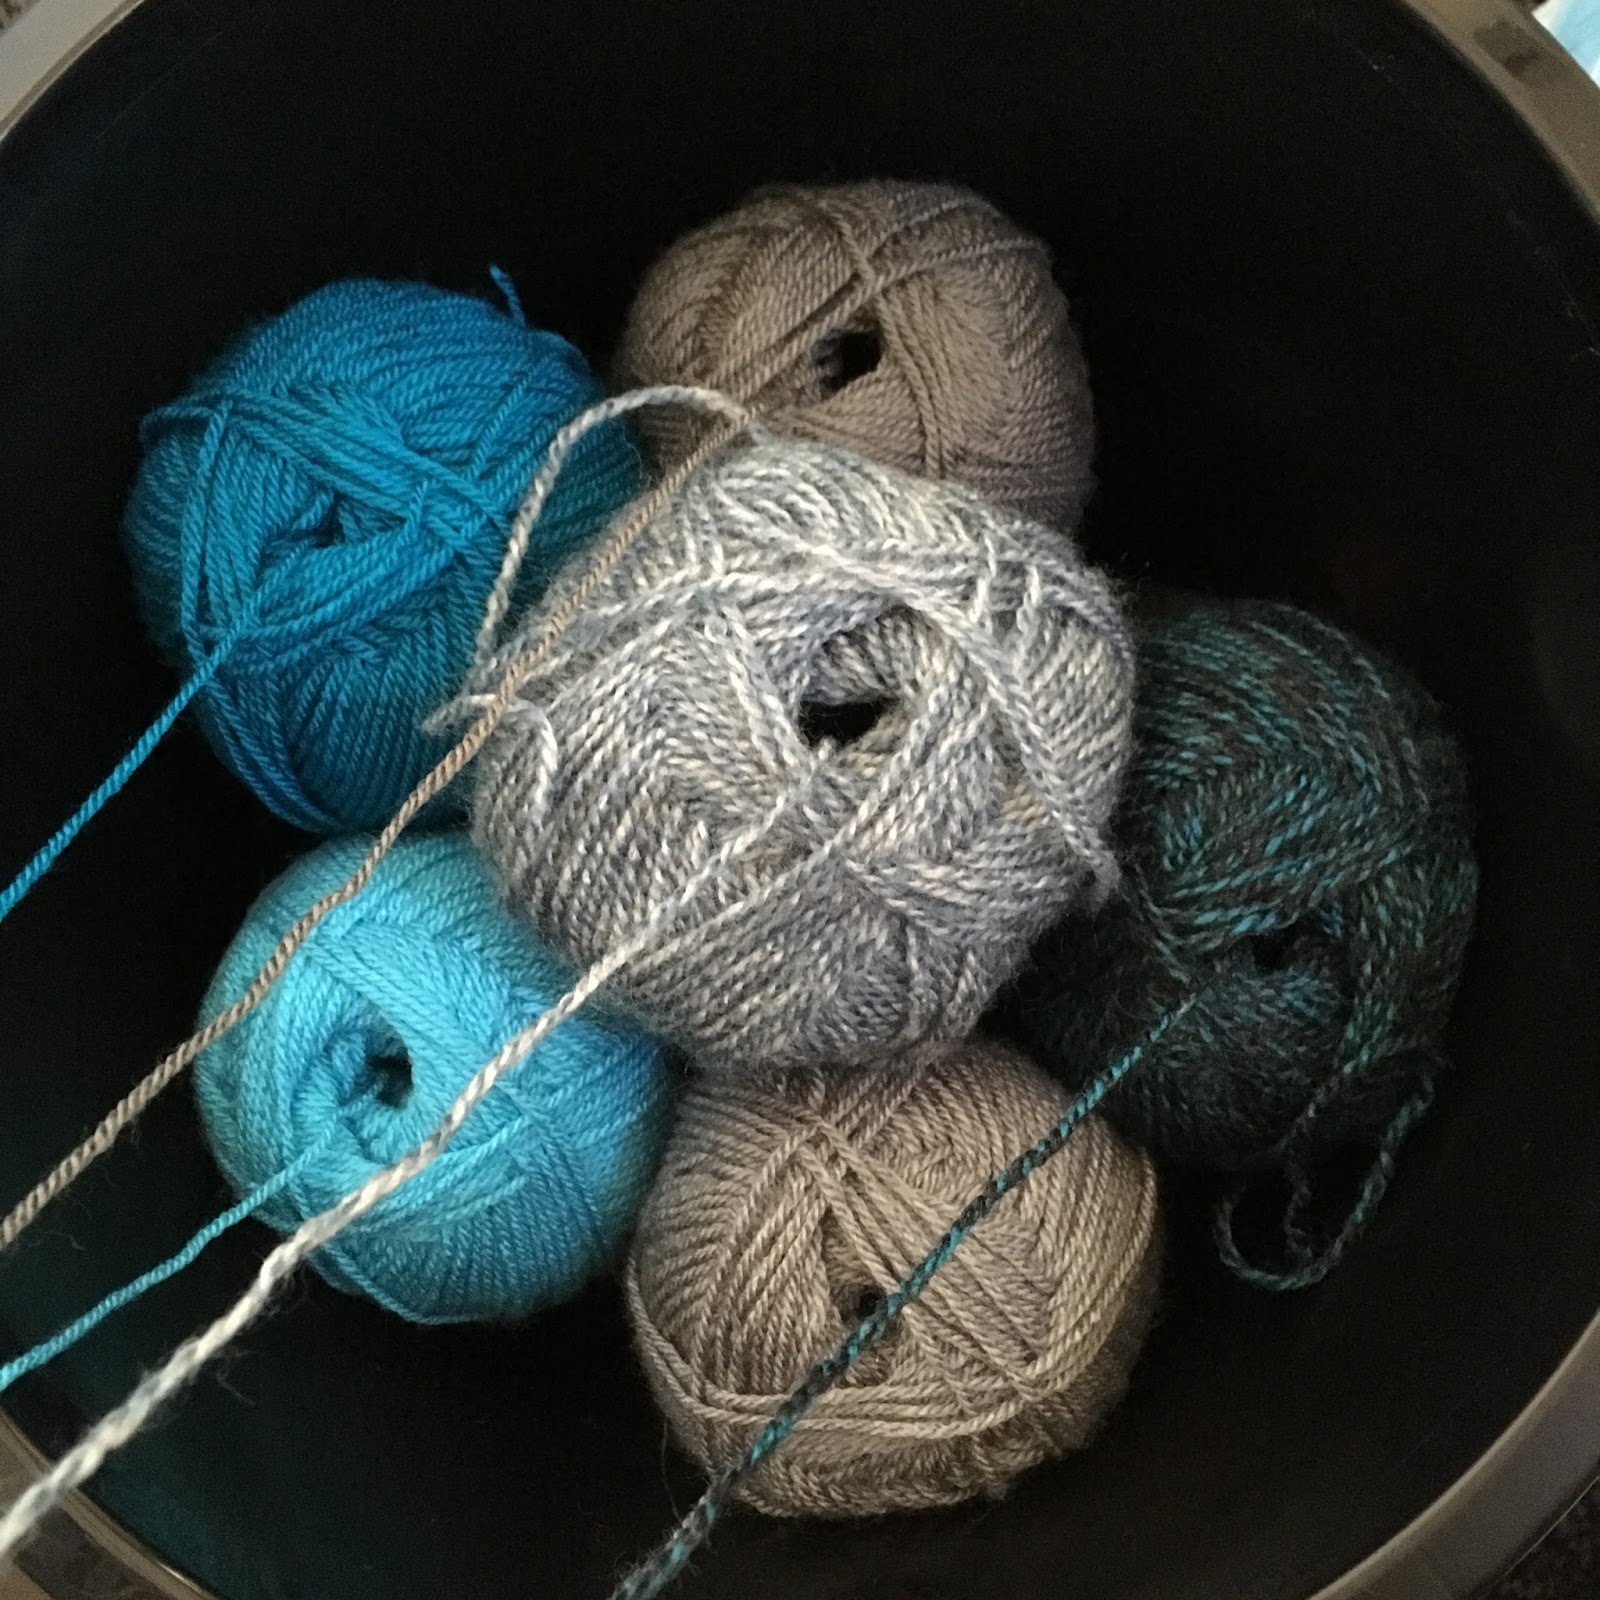
 I rolled the yarn into one big ball by using a bucket, basically I wedged them all inside and pulled the yarn from the inside, there were some yarn barf moments but on the whole it was pretty easy to do I just took my time because I was in no rush. The wound ball just showed off how brilliant the colours looked together and I was so excited to see how the blanket turned out, I used the free basic tutorial that is on the Lottie and Albert blog - HERE but Lindsey has got a paid pattern in her Etsy store - HERE that goes into more detail, it has 5 different blanket sizes, a pillow to match and all the yarn requirements plus advice for rolling the giant yarn ball and a full photo tutorial too!

I made a bigger blanket than the tutorial because I wanted my sister to be able to wrap herself up in it so I did a longer chain at the beginning, I can't quite remember how many I did in the end because I experimented with a few different sizes before deciding. Because you use a 20mm hook it grows really fast, the best part is the hook actually does most of the work if you let it, I quickly got into a rhythm once I found a comfortable way to hold the yarn and tension wasn't an issue.

The 1.2kg Monster Ball and the 20mm Hook 

I'm not quite sure what the exact size of the finished blanket was but I know it was roughly the size of a UK double bed which was the perfect size for her to cuddle up in.

The blanket is so soft and squishy and although it will keep her warm the stitches are also open enough to allow some air flow so she won't get too hot. I really loved making this blanket, it was fun and easy to make and looks really striking with the way the colours all swirl together. My sister absolutely loved it, she has used it every day since she opened it!

Sherbet Rainbow Blanket


Love how bright these colours are!

A few months ago I crocheted a Attic24 Neat Ripples blanket ready for the arrival of my sister's baby, at the time I decided that I was going to make his brother, my eldest nephew, a blanket as well and that's who this blanket is for. My nephew is 4 and he LOVES bright colours so this neon colour palette was perfect for him, it kind of reminds me of Wonka's Rainbow Nerds, which coincidentally we both love! I used Stylecraft Special DK again this time in the colours Lipstick (1246), Jaffa (1256), Fiesta (1257), Bright Green (1259), Citron (1263) and Sherbert (1034). This time I only used six balls as he doesn't need it as big and I did the same amount of stitches as stated in the free basic tutorial. I really cannot fault this pattern I've made two now and I would happily make another because they're quick and easy to make and they look and feel fantastic when they're finished so they make the perfect presents!


600g Mini Monster Ball ;)

Simply Crochet Pick 'n Mix CAL


The Finished Blanket

Yeah I made three blankets for gifts... This one was for my aunt she's a huge supporter of everything I make so when I saw this is Simply Crochet I knew I wanted to make it for her! It was a subscriber only pattern initially but you can now get it on Ravelry HERE. There are 12 different squares done in 2 different colour combinations which gives you a total of 24 squares, the squares are awesome, they vary in difficulty, some are lacy, some are more solid and there are even a few 3D ones which I really enjoyed crocheting.


I used Sirdar Super Soft yarn as a substitute because again I wanted it to be machine washable and dryable, the colours I used are 927 Trunkie, 893 Grassy (discontinued), 910 Peacock, 917 Sugarsnap, 824 Red Poppy, 922 Bobby, 918 Peanut, 820 Sugar Plum, 902 Fab Fuchsia. I was so behind the CAL that I didn't really join in just collected the patterns then made one big job lot of squares, I was really impressed by the way they are joined, it's so simple yet so effective and the latice effect really goes perfectly with all the different squares which given how different they all are is no easy feat. I think if I had to choose one then the spiral square would have to be my favourite, it looks really complicated but I actually found it realy easy! 

Mermaid Scales Shawl


This shawl was for my Nan, she had seen my Lost In Time shawl and really liked the gradient yarn so I thought I'd make her something similar for Christmas. I used Rico Cotton Dégradé in the Teal colour way and a free pattern from Katia which can be found HERE, I made a slight change to the pattern by skipping the dc (UK terms) in between the fans, it was a subconscious decision I made after a handful of repeats so I'm not really sure why I did it but I definitely prefer the look of it, the pattern is written for the Katia Spring Rainbow yarn cake and the Rico one I used is about 200m more so I just carried on as far as I could which resulted in a pretty large shawl, the only picture I managed to take with it all in was the one below when it was blocking (there was about 8 foam mats across the top).

While I was blocking the shawl

The yarn was good to work with, I didn't find it snagging or splitting too much, it did occassionally because there is no twist which I found quite intriguing, I would definitely use this yarn again and the shawl was an absolute hit with my Nan.


Messy Bun Beanies


Blue
 I wasn't crocheting when the Messy Bun beanie craze hit so these are the first two I've made. The blue one was for my cousin, she was asking me what I was planning on making next and the minute I showed her the pattern she gave me the gigantic puppy dog eyes and asked me to make her one... She's also my goddaughter so really how could I refuse?!? I can't remember the stitch or row count because I really was just making it to size I got the pattern from the Crochet M@ssy Buns & Beanies Facebook page, there is also a video tutorial on YouTube HERE. I made this hat using the Womens Institute Premium Acrylic yarn in Light Blue, this yarn is exclusive to Hobbycraft in the UK it's a DK weight yarn and it's so unbelievably soft, I love working with this yarn! This was my first attempt at crocheted cables and I really enjoyed them, I love the way they look and I think they are pretty fun to do as well!


When my sister saw a picture of my cousins hat I got a two word text back..... GREY PLEASE!!! So I had a look through my yarn and found that I had another ball of the WI yarn in Grey and as it was a quick make I thought 'Why not' this one is a bit bigger than the blue one because my sister has a bigger head LOL I did more rows for the ribbed section then I think I done another whole cable repeat extra... Same pattern as before just bigger.


Tulip Mittens


When I saw these on Ravelry I instantly fell in love with them and knew my friend would love them too... I was instantly drawn to the way the tulips go around the wrist and how it all matches, you can get the pattern for free HERE. For these I used Scheepjes Stone Washed in 805 Blue Apatite for the main colour and Scheepjes Catona in 241 Parrot Green and 130 Old Lace for the contrast colours. I can't praise Scheepjes yarns enough, I have used a few of their yarns now and I honest just love them all, they are a true joy to work with! The Stone Washed yarn is a Sport weight, 78% Cotton and 22% Acrylic and it is so soft, it has a woolly feel and a slight halo which just makes it look and feel so luxurious. The Catona is a 4ply 100% Mercerized Cotton and comes in a whopping 109 colours in 10g, 25g, and 50g balls, it's a pretty versatile yarn, you can pretty much use it for anything including amigurumi. There isn't really much to say about the pattern, it's well written and easy to follow, and I'm pretty sure you can change the size fairly easily aswell.

So all in all I had a fairly crafty Christmas, I found that people actually seemed to appreciate these gifts more than they did the shop bought presents from previous years which was a pretty awesome feeling! :) I'll HOPEFULLY have a post up about the final Christmas gift soon but if you want to see it now you can head on over to my Ravelry page and check out my projects page, it's the Hufflepuff Cowl (my friend picked the pattern and yarn she just hasn't seen the finished cowl). I know this was a super long post and if you're still reading I really appreciate you sticking it out! :D I'll be back again with more crafty goodness SOON!!!! 

-Lily

SpoolPod & Garment Planner Notepad Review!

Hey guys! I'm back today reviewing some bits from Creative Industry . When they emailed me asking me if I'd like to review their new...