Pages

Wednesday, 31 January 2018

Blogger's Bible Review

Blogger's Bible

from
Stationery Geek


Front Cover
So a few months back I was browsing the Stationery Geek website after discovering their Crochet Project Bible and I stumbled across this gem and just knew I had to buy it, it's basically a planner for your blog... But it is so much more than just a planner -  with nearly 2000 social media stickers, inspirational pages, contacts pages and even goals and achievements it's kind of like having a bit of a cheerleader to keep you motivated, I haven't started using it properly yet but it's given me loads of ideas for future posts that I've already started planning and that's just from looking through it.

I'm going to talk about Stationery Geek for a minute... They are a fantastic company with a fairly diverse range of products, some of my favourites include, My Crochet Project Bible, the Crochet/Knitting/Craft Pencils and My Quilting Project Bible (my big craft goal for 2018 is to make a quilt so I'll definitely be getting this soon!) They don't just make items for crafters they also make stuff for kids, families, fitness, schools and teachers... They really have something for everyone and they are more than happy to customise the items too so you can have your logo or a photo on them or even just your name, or if you're like me and have the Blogger's Bible you can plan to do some customising of your own and actually paint or heat emboss the cover ;) Seriously go and have a look at their products you won't be sorry, they ship worldwide too.

(here is a link to get you 10% off your first order from Stationery Geek  CLICK HERE just wait for the box to appear, pop in your email and you'll get a code for 10% off ANYTHING on their site, this link is a referral link so I'll get a discount voucher if you order)

My Custom Stickers

Now let's talk about the awesomeness that is the Blogger's Bible, like I said above inside you get nearly 2000 stickers, they are all different social media icons (blog, Facebook, Twitter, Instagram, Pinterest, LinkedIn, Snapchat, Email, Google+ and YouTube, there is also a plain white box at the end which you could use for anything) so you can keep track of where you've posted and where you still need to post, also there is a pretty awesome page which shows you the peak times to post to each social media platform so you can get your posts maximum visibility! The stickers are actually a part of the book so you don't have to worry about losing them and when you've used a whole page you can just cut/rip it out if you don't want the empty page in there. I don't use all the social medias that the stickers cover so I emailed Stationery Geek and asked if I could swap some (see photo above) and they were SO helpful, after a few emails back and forth they knew exactly what I wanted and had told me how to go about ordering it, which couldn't have been simpler, the dispatch time was pretty incredible too, I ordered one day and it was shipped the next which is amazing anyway let alone for a customised item.

Grid Calendar

There are 2 calendars in the book, grid style and list style, I know that I prefer different styles of calendar depending on what I'm using it for so I'm planning to actually use the two different calendars in the organiser for different things, the grid one will be for planned posts and CALs I'm participating in and  I haven't quite decided what I'll use the list one for just yet... 

Schedule Page
It's A4 in size so you don't have to worry about squeezing your handwriting into small spaces because there is more than enough room on each page. Each month is separated with its own cardboard divider that matches the cover and each month has it's own brainstorming page, goals/monthly overview, grid calendar and then the schedule pages (pictured above) at a glance on the schedule pages you can see if a post has been written, proofed, scheduled, published and if the photos have been taken, the idea is that you can tick the boxes when each task has been completed or if you want to be more thorough there is enough room to write the date each task was done instead. The greyed out social media icons are where you put the stickers once you've posted and there is a Follow Up bar below that to remind you to check for comments etc, there is space for 14 different blog posts each month which is more than enough for me!

Monthly Divider
All in all I think this is a brilliant product and I can't wait to use it properly, I think it's going to be so helpful with keeping me organised and focused so hopefuly it'll mean more posts and content and that I remember to update my projects on Ravelry more often ;) I've been thinking about this and it's great doing a post like this letting people know all about the product and how you 'think' it's going to help you but what you really need is updates to PROVE how effective it has been, so at the end of June I will be doing a 6 month update and at the end of the year I will be doing a 12 month update too.

***These opinions are completely my own!***

Wednesday, 17 January 2018

Christmas Crocheting

Hi everyone, once again there has been a big gap between posts :( unfortunately life and illness got in the way BUT I am aiming to carve out time each week to dedicate it to writing and scheduling posts :D Anyway this post is titled Christmas Crocheting because this year I decided to make more presents, I ended up making 8 things in total and rather than write a post for each item I thought I'd round 7 of them in one neat tidy post, the 8th hasn't been given to the recipient yet so that post will come later, so here goes...

Stormy Seas Blanket

The colours for this blanket were partly inspired by this piece of art

I wanted to make my sister something special this year as she was pregnant and due in December, I thought that a blanket would be perfect so I started searching for a pattern but after an hour of looking I wasn't having much luck, the problem with that became apparent pretty quickly when I thought about it... I hadn't decided what type of blanket I wanted to make! At the time I was watching some podcasts on YouTube and one of the podcasts/vlogs that I love watching is the one by Lindsey from Lottie and Albert, I think she has a great energy and she always has an interesting range of projects on the go too, as well as designs, and it was one of her designs that really caught my eye, the Lottie and Albert Rainbow Blanket, the idea of using six strands of DK and a 20mm hook was intriguing to me so I started looking into it.

My sister isn't really into rainbows but she loves blues, turquoises and teals so I had a look at my Stylecraft Special DK Shade Card, I wanted something that was machine washable and dryable and I love working with Stylecraft so it was a no brainer. It wasn't hard to pick out six colours that she'd love that go well together in fact it was hard to only choose six, the colours I used were Graphite (1063), Grey (1099), Atlantis (1202), Waterfall (1125), Turquoise (1068) and Empire (1829), I used two balls of each colour because I wanted it to be big enough for her to wrap up in it, so in the end the blanket ended up being roughly twelve balls which is 1.2kg of yarn!

When it came to getting a hook big enough the choices are a lot more limited... I had two options, I could get a plastic one from Pony or a wooden one from KnitPro, after holding the plastic one at my local yarn store I came home and thought long and hard about it and in the end decided that I wanted the wooden one, I have absolutely nothing against Pony or plastic hooks in general I just didn't like the way this particular one felt in my hand, it just didn't feel right holding something that size and it having no weight behind it, so I ordered the 20mm Jumbo Birch hook from KnitPro and when it arrived it felt so much better in my hands more natural and a lot less awkward!

Winding the yarn
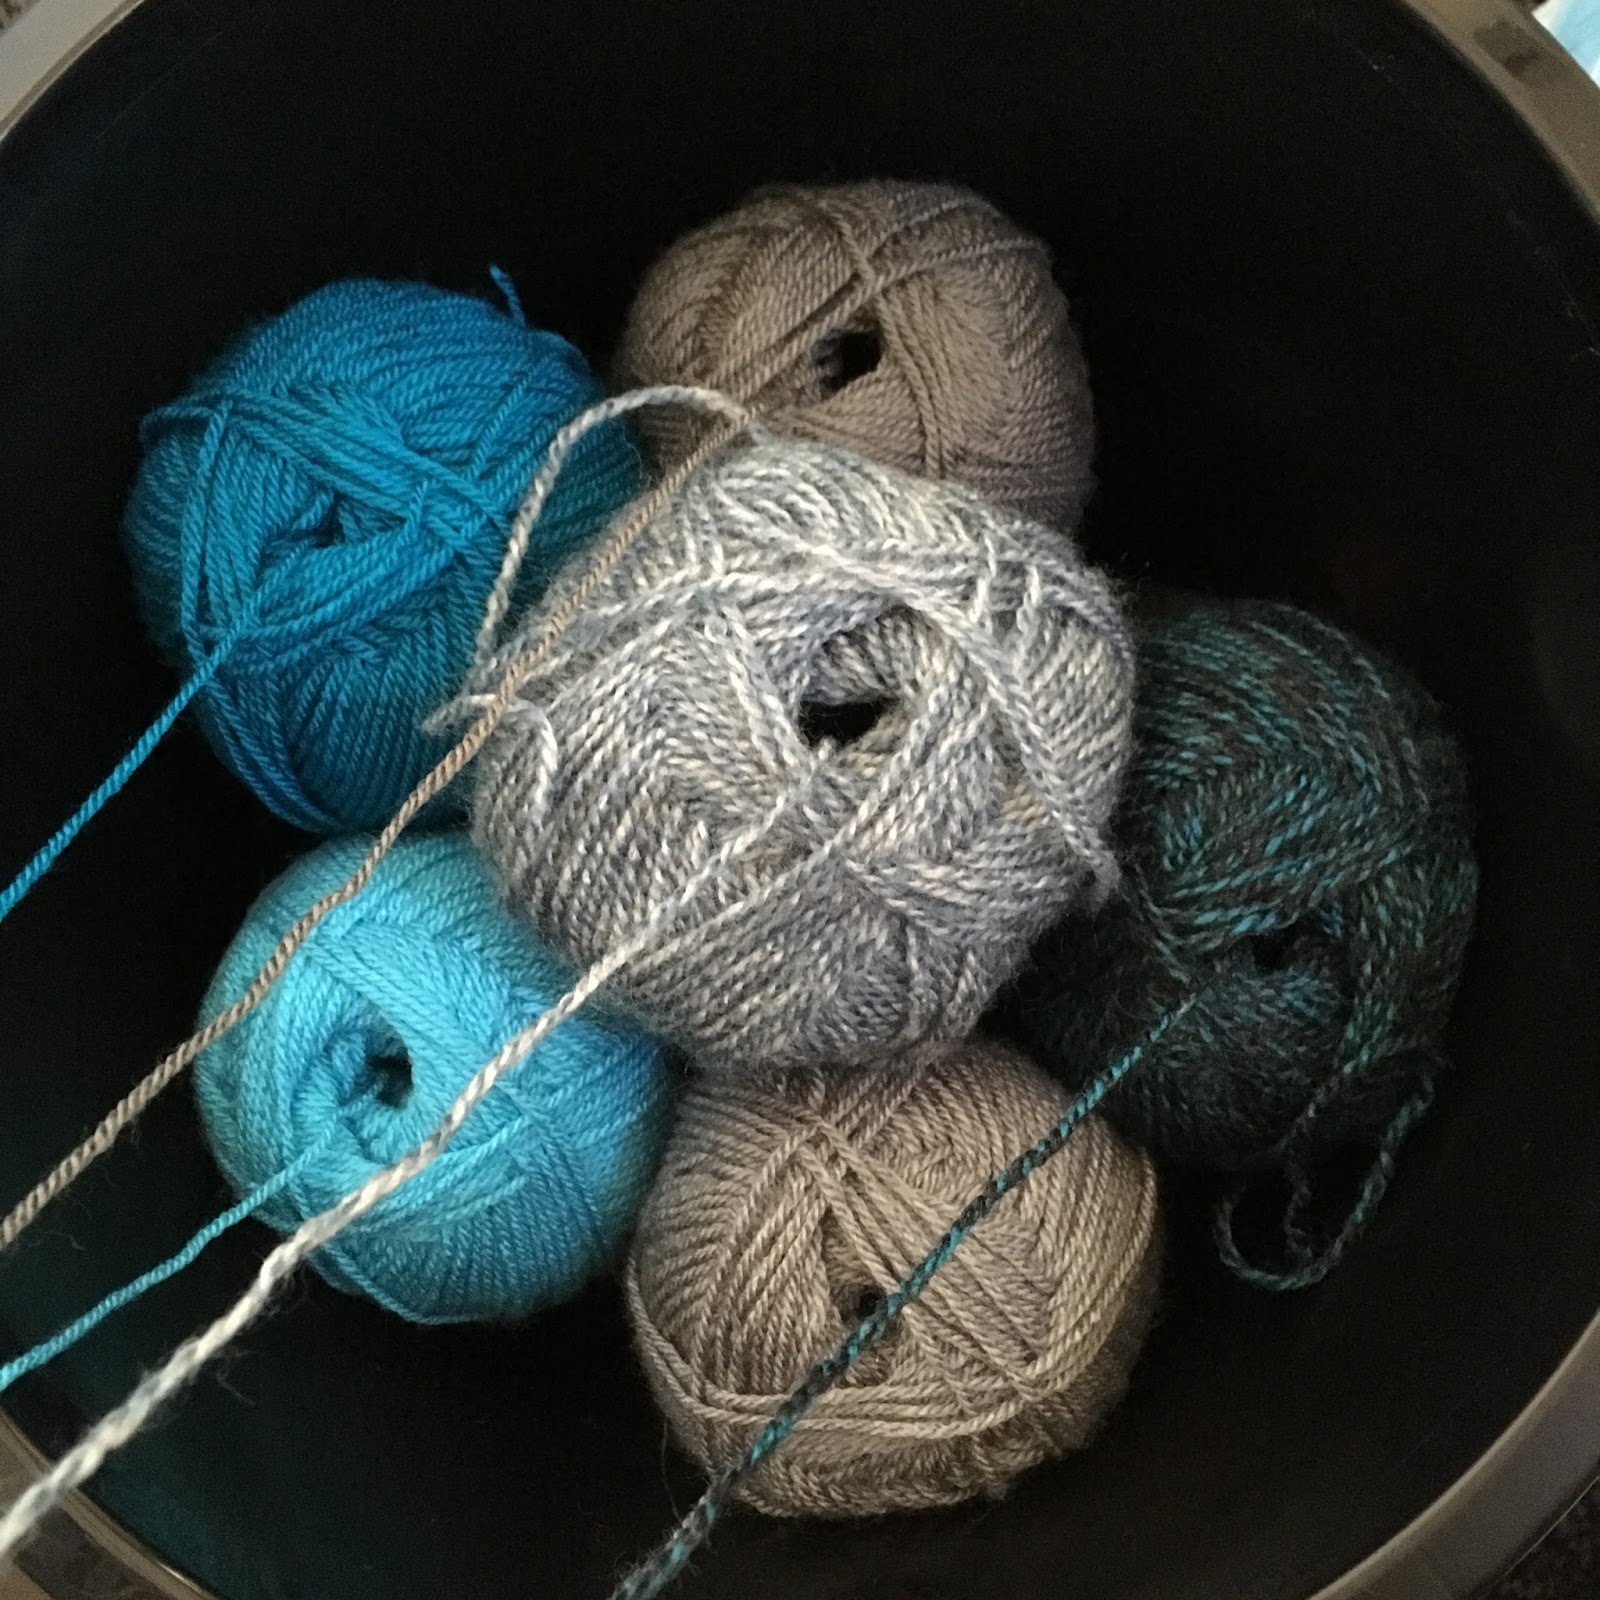
 I rolled the yarn into one big ball by using a bucket, basically I wedged them all inside and pulled the yarn from the inside, there were some yarn barf moments but on the whole it was pretty easy to do I just took my time because I was in no rush. The wound ball just showed off how brilliant the colours looked together and I was so excited to see how the blanket turned out, I used the free basic tutorial that is on the Lottie and Albert blog - HERE but Lindsey has got a paid pattern in her Etsy store - HERE that goes into more detail, it has 5 different blanket sizes, a pillow to match and all the yarn requirements plus advice for rolling the giant yarn ball and a full photo tutorial too!

I made a bigger blanket than the tutorial because I wanted my sister to be able to wrap herself up in it so I did a longer chain at the beginning, I can't quite remember how many I did in the end because I experimented with a few different sizes before deciding. Because you use a 20mm hook it grows really fast, the best part is the hook actually does most of the work if you let it, I quickly got into a rhythm once I found a comfortable way to hold the yarn and tension wasn't an issue.

The 1.2kg Monster Ball and the 20mm Hook 

I'm not quite sure what the exact size of the finished blanket was but I know it was roughly the size of a UK double bed which was the perfect size for her to cuddle up in.

The blanket is so soft and squishy and although it will keep her warm the stitches are also open enough to allow some air flow so she won't get too hot. I really loved making this blanket, it was fun and easy to make and looks really striking with the way the colours all swirl together. My sister absolutely loved it, she has used it every day since she opened it!

Sherbet Rainbow Blanket


Love how bright these colours are!

A few months ago I crocheted a Attic24 Neat Ripples blanket ready for the arrival of my sister's baby, at the time I decided that I was going to make his brother, my eldest nephew, a blanket as well and that's who this blanket is for. My nephew is 4 and he LOVES bright colours so this neon colour palette was perfect for him, it kind of reminds me of Wonka's Rainbow Nerds, which coincidentally we both love! I used Stylecraft Special DK again this time in the colours Lipstick (1246), Jaffa (1256), Fiesta (1257), Bright Green (1259), Citron (1263) and Sherbert (1034). This time I only used six balls as he doesn't need it as big and I did the same amount of stitches as stated in the free basic tutorial. I really cannot fault this pattern I've made two now and I would happily make another because they're quick and easy to make and they look and feel fantastic when they're finished so they make the perfect presents!


600g Mini Monster Ball ;)

Simply Crochet Pick 'n Mix CAL


The Finished Blanket

Yeah I made three blankets for gifts... This one was for my aunt she's a huge supporter of everything I make so when I saw this is Simply Crochet I knew I wanted to make it for her! It was a subscriber only pattern initially but you can now get it on Ravelry HERE. There are 12 different squares done in 2 different colour combinations which gives you a total of 24 squares, the squares are awesome, they vary in difficulty, some are lacy, some are more solid and there are even a few 3D ones which I really enjoyed crocheting.


I used Sirdar Super Soft yarn as a substitute because again I wanted it to be machine washable and dryable, the colours I used are 927 Trunkie, 893 Grassy (discontinued), 910 Peacock, 917 Sugarsnap, 824 Red Poppy, 922 Bobby, 918 Peanut, 820 Sugar Plum, 902 Fab Fuchsia. I was so behind the CAL that I didn't really join in just collected the patterns then made one big job lot of squares, I was really impressed by the way they are joined, it's so simple yet so effective and the latice effect really goes perfectly with all the different squares which given how different they all are is no easy feat. I think if I had to choose one then the spiral square would have to be my favourite, it looks really complicated but I actually found it realy easy! 

Mermaid Scales Shawl


This shawl was for my Nan, she had seen my Lost In Time shawl and really liked the gradient yarn so I thought I'd make her something similar for Christmas. I used Rico Cotton Dégradé in the Teal colour way and a free pattern from Katia which can be found HERE, I made a slight change to the pattern by skipping the dc (UK terms) in between the fans, it was a subconscious decision I made after a handful of repeats so I'm not really sure why I did it but I definitely prefer the look of it, the pattern is written for the Katia Spring Rainbow yarn cake and the Rico one I used is about 200m more so I just carried on as far as I could which resulted in a pretty large shawl, the only picture I managed to take with it all in was the one below when it was blocking (there was about 8 foam mats across the top).

While I was blocking the shawl

The yarn was good to work with, I didn't find it snagging or splitting too much, it did occassionally because there is no twist which I found quite intriguing, I would definitely use this yarn again and the shawl was an absolute hit with my Nan.


Messy Bun Beanies


Blue
 I wasn't crocheting when the Messy Bun beanie craze hit so these are the first two I've made. The blue one was for my cousin, she was asking me what I was planning on making next and the minute I showed her the pattern she gave me the gigantic puppy dog eyes and asked me to make her one... She's also my goddaughter so really how could I refuse?!? I can't remember the stitch or row count because I really was just making it to size I got the pattern from the Crochet M@ssy Buns & Beanies Facebook page, there is also a video tutorial on YouTube HERE. I made this hat using the Womens Institute Premium Acrylic yarn in Light Blue, this yarn is exclusive to Hobbycraft in the UK it's a DK weight yarn and it's so unbelievably soft, I love working with this yarn! This was my first attempt at crocheted cables and I really enjoyed them, I love the way they look and I think they are pretty fun to do as well!


When my sister saw a picture of my cousins hat I got a two word text back..... GREY PLEASE!!! So I had a look through my yarn and found that I had another ball of the WI yarn in Grey and as it was a quick make I thought 'Why not' this one is a bit bigger than the blue one because my sister has a bigger head LOL I did more rows for the ribbed section then I think I done another whole cable repeat extra... Same pattern as before just bigger.


Tulip Mittens


When I saw these on Ravelry I instantly fell in love with them and knew my friend would love them too... I was instantly drawn to the way the tulips go around the wrist and how it all matches, you can get the pattern for free HERE. For these I used Scheepjes Stone Washed in 805 Blue Apatite for the main colour and Scheepjes Catona in 241 Parrot Green and 130 Old Lace for the contrast colours. I can't praise Scheepjes yarns enough, I have used a few of their yarns now and I honest just love them all, they are a true joy to work with! The Stone Washed yarn is a Sport weight, 78% Cotton and 22% Acrylic and it is so soft, it has a woolly feel and a slight halo which just makes it look and feel so luxurious. The Catona is a 4ply 100% Mercerized Cotton and comes in a whopping 109 colours in 10g, 25g, and 50g balls, it's a pretty versatile yarn, you can pretty much use it for anything including amigurumi. There isn't really much to say about the pattern, it's well written and easy to follow, and I'm pretty sure you can change the size fairly easily aswell.

So all in all I had a fairly crafty Christmas, I found that people actually seemed to appreciate these gifts more than they did the shop bought presents from previous years which was a pretty awesome feeling! :) I'll HOPEFULLY have a post up about the final Christmas gift soon but if you want to see it now you can head on over to my Ravelry page and check out my projects page, it's the Hufflepuff Cowl (my friend picked the pattern and yarn she just hasn't seen the finished cowl). I know this was a super long post and if you're still reading I really appreciate you sticking it out! :D I'll be back again with more crafty goodness SOON!!!! 

-Lily

Saturday, 2 December 2017

Stylecraft Head Over Heels SOCKS Crochet vs Knitting

Stylecraft Head Over Heels SOCKS Crochet vs Knitting


Crochet (left) Knitted (right)

Hey guys so it's been longer than I would have liked between posts but it couldn't be helped as my projects have been all pretty hush hush because they are all Christmas presents and then I got ill!! I guess the plus side to that is that I'll have loads to share after Christmas, but for now I have come up with this little comparison post for you.


Crochet


A few months back I crocheted my first ever pair of socks using Stylecraft Head Over Heels in the Fuji colourway, I was following a Rohn Strong pattern that had been published in Simply Crochet magazine. I thought it was a brilliant pattern, simple yet effective and really well explained so it was the perfect pattern for me as a total beginner. As you can see I didn't attempt to colour match the two socks, I just wound them into two 50g yarn cakes and went for it! and in actual fact they ended up being polar opposites which I really kind of love. I read loads of tips before I started and luckily enough printed on the pages before the pattern there was a hints and tips bit, I still had a look online too but it was handy just having those to hand, a lot of blog posts that I read said to do the socks at the same time to help keep tension even and to stop yourself from getting second sock syndrome, as you can see from the photos above I did work them at the same time but that was mainly for the tension side of things, I am not someone that would be able to do one and never get the other done, it would honestly drive me mad to have something half finished laying around. I really enjoy crocheting with Stylecraft yarn anyway because I think it looks incredible and feels nice to work with but I LOVED working with this yarn it was so much fun seeing the colours change too!


Knitting

I have been a knitter for most of my life but I've never knitted socks before, and until about a month or so ago I had no desire to... Then I saw a post on Instagram showing last years West Yorkshire Spinners Christmas sock pattern and I just knew I needed to make them, but I didn't want to use the special Christmas yarn and pattern for my first ever pair for obvious reasons, so I went to my local yarn store and grabbed another ball of Head Over Heels yarn this time in the Etna colourway and the needles I needed to follow the Winwick Mum Sockalong, if you want to knit socks then definitely go check her blog out it's honestly a brilliant way to start. This time as you can see I did colour match my socks and I'm pretty pleased with how they look this time too, I don't think I'm someone that will always need their socks to match but I can see where it would be appropriate. I think the Stylecraft yarn was just as nice to use for knitting as it was for crochet, I know with some yarns you can tell that they were made with crocheters or knitters in mind but as always Stylecraft is really spot on.

Crochet socks end up being thicker than knitted socks so it uses more yarn than knitting does, I think I had about 10g left from each crocheted sock and I think the knitted ones used around 30g each and I have quite big feet so you could easily get 3 socks out of one ball when knitting so I guess that's a pro to knitting but then crochet works up quicker than knitting does, so I guess it all depends on what look and feel you prefer. I thought by the end of this post I'd have some pros and cons but honestly I didn't have any splitting or anything negative with either method. I don't even really have a preference for how the colour sections work up because they look pretty much the same. 

Saturday, 28 October 2017

BumpyCrafts TAAT Sock Project Bag Review

BumpyCrafts TAAT (two at a time) Sock Project Bag Review

I recently won this project bag in a giveaway on Instagram and thought I'd write a quick review on it. I'm not 100% sure how I came across this amazing maker but I'm glad I did, her work is impeccable and I love her designs. This bag is the small two at a time bag with divider, it also comes in 2 bigger sizes, medium and large, and you can also choose whether or not you want the divider, and of course she has a large range of fabrics including some rather gorgeous Christmas ones! This review is 100% honest and all opinions are my own.

It's the perfect cross between a tote and a drawstring bag, the drawstring part is sewn to the top of the bag so it's all one unit, so there's no worrying about it falling out or being misplaced. This particular bag was made using a fun fancy dress cat Halloween themed fabric for the outside, red polkadots for the drawstring part and a lovely pumpkin orange for the inside, I am in no way a cat person but this fabric just made me smile when it appeared in my feed and I had to enter, there's just something amusing about seeing a cat dressed up as Dracula and Frankenstein!

Outside Pocket
Side View
If you look at the moon behind the cat dressed as a bat in the photo on the left above then you'll just about see the invisible outside pocket, I've found this very handy for keeping stitch markers, a tape measure and a scrap piece of yarn in for when I take my socks off the needles to try them on. The drawstring closes tightly so there's no worry about pets getting in and stealing anything (trust me I know... my dog has tried and failed much to his displeasure), as you can see from the photos it has a square bottom so it can stand on it's own competently, the straps are strong and a good length just perfect for hanging it over your forearm.
Inside Pocket

Inside View
The bag easily has enough room for 2 separate yarn cakes or balls, one on either side of the divider, I have never knitted socks two at a time so I can't comment on how easy it is to use this bag for those projects, but as you can see I've got both of my yarn cakes ready to use and I like to use the divider pocket to hold the sock I'm working on I also cross over the tips of my circular needles and use the little white ribbon loops to hold the stitches on my needles by hooking them over the top. There is also a decent sized inside pocket with the BumpyCraft label on it which I use to store the ball band of the yarn I'm using for future reference.

All in all I love this bag, it's great quality, fit for purpose and very handy. I have had a browse through her Etsy store and there are so many great fabrics, bag styles, needles cosys etc to choose from! Have a look I'm sure she's got something that will catch your eye and if you can't find your perfect bag then don't fret because she also does custom orders, so there really is something for everyone!! You can find BumpyCraft on Instagram and Etsy 

Monday, 23 October 2017

What I've Been Up To This Week! (Week ending Oct 22nd 2017)

What I've Been Up To This Week!!


It has been one busy crafty week for me! I decided last weekend after seeing a pattern for West Yorkshire Spinners Christmas socks on Instagram that I needed to learn to knit socks, I've been a knitter for as long as I can remember but I have never attempted a pair of socks so I had no idea where to begin which meant a trip to my local yarn store! The owner is fantastic and she helped me choose some KnitPro Symfonie fixed circular needles, some Pony DPN's and I grabbed a ball of Stylecraft Head Over Heels sock yarn in the Etna colour way too. Armed with my new purchases I found my way to The Winwick Mum blog and started following her Sockalong posts, which are fantastic for sock knitting newbies, but I would definitely read them all the way through before trying to follow them because some of the instructions follow on or have extra tips further down the page. ! I got past the heel turn and gusset and was working on the foot section then tried my sock on again and came to the decision that I'm far too fussy with my socks to wear anything that is even slightly baggy on my feet, so I got some smaller needles and started again and the difference .75mm makes is crazy, my sock doesn't just feel better it looks so much better to, as you can see below.

First sock attempt using 3.25mm needles
Second sock attempt using 2.5mm needles
I then made another trip to the yarn store later on in the week because the new West Yorkshire Spinners Christmas sock yarn and pattern was due in, I didn't find out until I got down there that the pattern I saw on Instagram was for last years sock not this years and I was more than a little bit pleased when I saw the new colours because they are SO me, I just love how bright and happy they are and the first thing I think of when I look at them is definitely candy canes! The pattern is designed by Christine from The Winwick Mum blog, and you get it for free when you buy the candy cane yarn. I'm so excited to use this gorgeous yarn but I want to have one completed pair of socks done before I use it, it's all good because I've got time before Christmas comes around, I also grabbed some Kuszty Rose Quartz stitch markers which are so cute and a Stylecraft Special DK Shade Card because you can never go wrong with shade cards or yarn pegs!

WYS Christmas sock yarn!! Left to right Cayenne Pepper, Candy Cane and Chocolate Lime.

My amazing sister was talking to me one night and I told her about the Tunisian Crochet that I had been trying as part of the Super Simple Tunisian Crochet Along that Claudia from the Crochet Luna vlogcast and Hannah from The Cozy Cottage Crochet podcast are hosting. I told her about a particular bomber jacker pattern that I really wanted to do as a result of the CAL and that I'd need to buy slightly different hooks than what I had because of the stitch count and she bought me a set of KnitPro Symfonie Interchangeable Tunisian Hooks that I had been eyeing up for Christmas, AND gave them to me early just in case I managed to start my jacket before Christmas. I REALLY love the chevron detailing and the colours on the KnitPro Symfonie range but these are something else, the neon colour coded cables are awesome and I can't wait to use my new hooks there is just something so satisfying when you're tools are just as pretty as the items you are making.

KnitPro Symfonie Interchangeable Tunisian Crochet Hooks
Look at those colours!!
If you follow me on Instagram then you will have seen the yarn for this WIP I have also been working on, it's an infinity scarf/cowl that I found on Ravelry called Kaitlyn by Cheryl Chow. It's going to be a Christmas present for a friend of mine, I'm using the Hufflepuff hand dyed 4ply yarn from Vicki Brown Designs because she is a total Potterhead and Pottermore sorted her into Hufflepuff so it had to happen. I'm about halfway through now and I am really loving the stitch pattern and the way the colours play out from the yarn. The friend who it's for chose the pattern and yarn but the final product will be a surprise so I'm not posting any pictures until she's actually got it so you'll be waiting a few months to see that, sorry, alternatively you could also pop over to my Ravelry and have a look at the project page for it :).

Hufflepuff Yarn from Vicki Brown Designs
I have been trying to work on my Scheepjes Garden Room Tablecloth kit but that isn't quite going to plan at the moment because my hands get quite dry in the winter and are prone to splitting open due to eczema, the Maxi Sweet Treat/Maxi Bonbon/Maxi Sugar Rush are lace weight yarns which can slice my skin open in this weather. So that WIP has gone away until the weather and my skin gets a bit better.

I don't like having too many WIPs on the go so that's all I've really got to talk about this week, I have been planning some other Christmas gifts that I'm hoping to start real soon!

Saturday, 14 October 2017

My Lost in Time Shawl


Yarn: Scheepjes Whirl in Lemon Cassis Cream
and Scheepjes Catona in Old Lace
Hook: 4mm Clover Amour 

So, much like everyone else I have become OBSESSED with gradient yarns... for me the Scheepjes Whirl was a total must have, every time they post about their new colours I immediately have a new favourite, I always knew that when I got one that I'd make a triangle shawl with it and after hours of scrolling through Ravelry I had my pattern, the Lost in Time Shawl by Mijocrochet.


Pattern

I wasn't a very experienced crocheter when I attempted this project, in fact I think it was only my second proper project, the pattern was well written and has photos to explain certain rows, but I would suggest reading the pattern to the end of the row to make sure you know exactly what to do before you start as there is a slight difference in how the pattern is written as the designer is from Sweden, the charts were handy to have as well because of this, on the whole though I didn't find the pattern too hard to follow and the trick is to keep an eye on your stitch count. At the beginning it's not really a problem as the rows are smaller, I was able to tell by eye if there was something not quite right but when you get into the repeats it can get hard and the last thing you want is to have to frog any of the longer rows! So my advice is don't be afraid to use stitch markers to keep track of the repeats within the rows and take breaks, it refreshes your eyes and your focus and will make the whole thing so much more enjoyable.

Yarn

The Scheepjes Whirl is incredible to work with, the colour changes are so subtle as they happen one strand at a time that I didn't realise that some of them were even happening, you can't see the joins either, as you are working it up you'll see a kind of fluffy bit but when it's worked in you can't see it at all which is amazing! I'm quite a tight crocheter so I used a 4mm hook and managed to do 6 swag sections in total + the border and 2 tassels with one Whirl, I used Catona for the very last row of the border because I tried to continue using the Whirl and decided that it didn't really look finished, so I tried the Catona that I had left over from my Hygge Shawl kit and was pleasantly surprised with the effect and decided to finish it off with it.


All in all I was really pleased with this project, I think the yarn and pattern are perfect together and I love how the colours of the Whirl make the different stitches pop. I will definitely use the Scheepjes Whirl again, in fact I have a few projects in mind already, and I wouldn't hesitate to do another pattern from Mijocrochet either.

SpoolPod & Garment Planner Notepad Review!

Hey guys! I'm back today reviewing some bits from Creative Industry . When they emailed me asking me if I'd like to review their new...